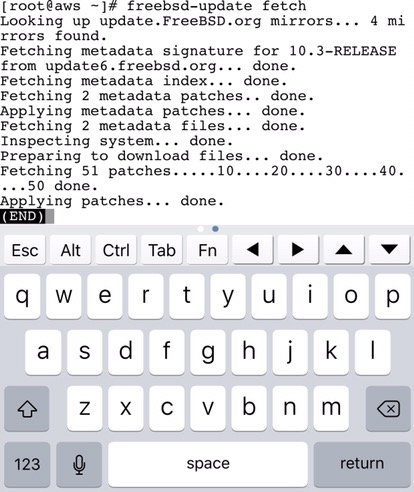
Doing morning FreeBSD update
Applying FreeBSD patches is freaking easy.
Do initrd dance before turning Linux physical server into VM
If one day you decide to convert your physical server to a VM, which could be easily achieved if all its disks are presented from SAN, then don’t forget to rebuild initrd beforehand. Otherwise you would see something similar to this:
No device found
Scanning and configuring dmraid supported devices
Scanning logical volumes
  Reading all physical volumes. This may take a while...
  No volume groups found
Activating logical volumes
  Volume group "VolGroup00" not found
Trying to resume from /dev/VolGroup00/LogVol01
Unable to access resume device (/dev/VolGroup00/LogVol01)
Creating root device.
Mounting root filesystem.
mount: could not find filesystem '/dev/root'
Setting up other filesystems.
Setting up new root fs
setuproot: moving /dev failed: No such file or directory
no fstab.sys, mounting internal defaults
setuproot: error mounting /proc: No such file or directory
setuproot: error mounting /sys: No such file or directory
Switching to new root and running init
unmount old /dev
unmount old /proc
unmount old /sys
switchroot: mount failed: No such file or directory
Kernel panic - not syncing: Attempted to kill init!
Also, if your SAN disks are multipathed, which is an obvious and the only correct choice, then you must (according to RedHat note) to disable multipath by editing /etc/sysconfig/mkinitrd/multipath, otherwise the system won’t boot:
# vi /etc/sysconfig/mkinitrd/multipath MULTIPATH=no
Root Cause
The multipath option should only be set to YES if you your root volume (/) is on a multipathed device
If multipath is enabled with root (/) on a local device, multipathing will enable at boot time and lock down the device
If the device is locked down, fsck will be unable to open it for checking
There are two options to rebuild initrd:
- Use mkinitrd or dracut, depending on the OS version you’re currently on, and pre-build a new initrd before detaching the disks from the old system.
- If the system has been already converted to a VM, .i.e. all disks from the old system have been detached and presented as RDMs to a new VM, then boot from a rescue disk, and chroot to /mnt/sysimage (if you are running RedHat or CentOS) and run mkinitrd or dracut from their. Keep in mind that /boot partition as well as /sys must be mounted in the chrooted environment or, again, your system will not fly.
mount --bind /proc /mnt/sysimage/proc
mount --bind /dev /mnt/sysimage/dev
mount --bind /sys /mnt/sysimage/sys
Good luck.
Workaround for Tomcat7 on Linux, JDBC and javax.naming.NamingException
A few days ago I was dabbling with JDBC and Tomcat7 and the configuration that seemingly had no issues resulted in the following error in the log file:
org.apache.catalina.core.NamingContextListener addResource
WARNING: Failed to register in JMX: javax.naming.NamingException: Could not create resource factory instance
[Root exception is java.lang.ClassNotFoundException: org.apache.tomcat.dbcp.dbcp.BasicDataSourceFactory]
Thankfully, Google pointed me to this post at stackoverflow.com which had both the solution and the link to the details behind this behaviour.
In the nutshell, the workaround looks like the following:
- Grab tomcat-dbcp-version.jar from Maven that
matches the version of Tomcat you are running and place it in $CATALINA_HOME/lib. Copying it somewhere else and creating a link also works. - Update <Resource/> section in context.xml file by adding the following line:
factory="org.apache.commons.dbcp.BasicDataSourceFactory"
- Restart Tomcat
Peace.
P.S. Did a quick test and it looks like that FreeBSD distributes tomcat-dbcp.jar as part of its tomcat package:
# pkg query %Fp tomcat7 | grep dbcp
/usr/local/apache-tomcat-7.0/lib/tomcat-dbcp.jar
“Change master” to the rescue or how to revive MySQL replication
Sometime ago had an issue with MySQL replication that consecutively faulted with two different errors. Initially with this one:
Last_Error: Relay log read failure: Could not parse relay log event entry. The possible reasons are: the master’s binary log is corrupted (you can check this by running ‘mysqlbinlog’ on the binary log), the slave’s relay log is corrupted (you can check this by running ‘mysqlbinlog’ on the relay log), a network problem, or a bug in the master’s or slave’s MySQL code. If you want to check the master’s binary log or slave’s relay log, you will be able to know their names by issuing ‘SHOW SLAVE STATUS’ on this slave.
Thankfully, this error was easy to fix with the help of change master SQL statement:
change master to master_log_file='mysql-bin.000047', master_log_pos=152667618;
However, the second error kicked in immediately right after that:
Got fatal error 1236 from master when reading data from binary log: ‘Client requested master to start replication from impossible position; the first event ‘mysql-bin.000048’ at 223481321, the last event read from ‘/var/log/mysql/mysql-bin.000048’ at 4, the last byte read from ‘/var/log/mysql/mysql-bin.000048′ at 4.’
This one was also a no-brainer if you know how to fix them
Armed with mysqlbinlog it was easy to verify that there were no logs past 223481321 position:
mysqlbinlog --base64-output=decode-rows --verbose --start-position=223481321 ./mysql-bin.000048
/*!50530 SET @@SESSION.PSEUDO_SLAVE_MODE=1*/;
/*!40019 SET @@session.max_insert_delayed_threads=0*/;
/*!50003 SET @OLD_COMPLETION_TYPE=@@COMPLETION_TYPE,COMPLETION_TYPE=0*/;
DELIMITER /*!*/;
DELIMITER ;
# End of log file
ROLLBACK /* added by mysqlbinlog */;
/*!50003 SET COMPLETION_TYPE=@OLD_COMPLETION_TYPE*/;
/*!50530 SET @@SESSION.PSEUDO_SLAVE_MODE=0*/;
Thus the proper solution in that case was to manually point the slave to the next available bin log:
change master to master_log_file='mysql-bin.000049', master_log_pos=4;
DTrace is limping when rootless is enabled
Just learnt that DTrace can’t be run at full pelt when rootless Mac OS X feature is enabled. For example, iotop ends like this:
: probe description io:::start does not match any probes
And it seems that the only way out is to boot into a rescue mode and run csrutil disable to turn off the protection mode. Only after that you could call your best friends like iotop, iosnoop and many others which are published at DTrace Book page.
Btw, if you haven’t bought it yet I highly recommend to do so.
Interview fizzle as a chance to get better
Not a long ago I had one of those humiliating moments when a simple question makes you numb a or even worse – you begin to mumble an absolute rubbish. That is exactly what has happened to me recently and being an afterthought person (which, of course, doesn’t give me any advantage) I decided to do some homework/recap o the questions I’ve failed miserably.
- Linux PIPE
- First, take a look at struct pipe_buffer.
- Then study how an inode object and two file objects are created for pipe to work create_pipe_files().
- Linux VM overcommit
- MALLOC
- Swappiness
– Read vm sysctl documentation about the swappiness parameter.
– swappiness comes into play in get_scan_count() which is called from shrink_lruvec().
– If the code looks murky, take a look at the answer published at unix.stackexchange.com which goes in a greater details about vm.swappiness.
– Read about Split LRU
– Read “man 2 pipe” as it basically says it all in a single sentene:
pipe() creates a pair of file descriptors, pointing to a pipe inode, and places them in the array pointed to by filedes. filedes[0] is for reading, filedes[1] is for writing.
– Want to go deeper then the source code is the best place to start:
– Again, start from reading the documentation.
– Take a look at the code to figure out how the heuristic overcommit handling works. Especially, __vm_enough_memory() which is run by security_vm_enough_memory_mm(), which in turn could be called from different places, e.g. mmap_region(), acct_stack_growth(), do_brk(), insert_vm_struct(), dup_mmap().
– “man 3 malloc”, “man 2 mallopt”
– Go through do_brk() code.
And of course, buy, read and re-read Understanding the Linux Kernel even if it’s a bit dated.
Expanding ZFS rpool in Solaris 10
I was really bad at googling the steps to grow ZFS rpool online without using zpool append, so here is my little story how I’ve done it.
Before I begin, please, note that everything said below applies only to the configurations where rpool consumes a whole disk. If there is another partition sitting right after (or with some gap) your rpool, you’re risking to corrupt the data. So don’t blindly use the last cylinder (or “$”) when it’s time to modify the partition table.
- Here is the rpool:
- Saving the partition table first so later this information could be used to correctly re-lable (re-partition) the expanded disk. Btw, use “zpool status rpool -v” to find the device name:
- Behind the scene LUN was expanded. To confirm that luxadm could be quite handy (pay attention to “Unformatted capacity”) field:
- Time for the scariest part, i.e. re-lable the disk by installing a new partition table.
To be able to do that a new disk’s geometry must be somehow conveyed to the format utility and that’s surprisingly easy to achieve. Just run format, select the disk and use “type” option to autoconfigure it: - Notice that now it’s configured with a new capacity.
- Don’t leave the format prompt yet since we are not done. Next step is to carve out the partition table. Remember, that I only had two partitions (0 for root and 2 for backup) and your situation might be completely different, so don’t copy/paste rashly.
- Use the numbers from the menu to select the partition you’re willing to modify:
- For me, it was enough to set the size of all partitions to zero except the two: 0 (tagged as root) and 2 (tagged as backup). As you can see below wm (write-mountable) flag was set only for partition 0, whilst the rest have wu (write-unmountable):
- Label the disk and quit the format tool:
- Finally it’s time to grow ZFS rpool and to confirm we’re golden:
# zpool list rpool
NAME    SIZE  ALLOC   FREE  CAP  HEALTH  ALTROOT
rpool  31.1G  23.6G  7.52G  75%  ONLINE  -
# prtvtoc /dev/dsk/c4t60060E80167D3C0000017D3C000010CAd0s2
* /dev/dsk/c4t60060E80167D3C0000017D3C000010CAd0s2 partition map
*
* Dimensions:
*     512 bytes/sector
*     512 sectors/track
*      15 tracks/cylinder
*    7680 sectors/cylinder
*    8533 cylinders
*    8531 accessible cylinders
*
* Flags:
*   1: unmountable
*  10: read-only
*
*                          First     Sector    Last
* Partition  Tag  Flags    Sector     Count    Sector  Mount Directory
       0      2    00          0  65518080  65518079
       2      5    01          0  65518080  65518079
# luxadm display /dev/rdsk/c4t60060E80167D3C0000017D3C000010CAd0s2
DEVICE PROPERTIES for disk: /dev/rdsk/c4t60060E80167D3C0000017D3C000010CAd0s2
  Vendor:               HITACHI
  Product ID:           OPEN-V      -SUN
  Revision:             7006
  Serial Num:           50 17D3C10CA
  Unformatted capacity: 36864.000 MBytes
  Read Cache:           Enabled
    Minimum prefetch:   0x0
    Maximum prefetch:   0x0
  Device Type:          Disk device
# format
Searching for disks...done

AVAILABLE DISK SELECTIONS:
       0. c1t0d0
          /pci@0/pci@0/pci@2/scsi@0/sd@0,0
       1. c4t60060E80167D3C0000017D3C000010CAd0
          /scsi_vhci/ssd@g60060e80167d3c0000017d3c000010ca
Specify disk (enter its number): 1
selecting c4t60060E80167D3C0000017D3C000010CAd0
[disk formatted]
/dev/dsk/c4t60060E80167D3C0000017D3C000010CAd0s0 is part of active ZFS pool rpool. Please see zpool(1M).

FORMAT MENU:
        disk       - select a disk
        type       - select (define) a disk type
        partition  - select (define) a partition table
        current    - describe the current disk
        format     - format and analyze the disk
        repair     - repair a defective sector
        label      - write label to the disk
        analyze    - surface analysis
        defect     - defect list management
        backup     - search for backup labels
        verify     - read and display labels
        save       - save new disk/partition definitions
        inquiry    - show vendor, product and revision
        volname    - set 8-character volume name
        !     - execute , then return
        quit
format> type

AVAILABLE DRIVE TYPES:
        0. Auto configure
        1. Quantum ProDrive 80S
        2. Quantum ProDrive 105S
        3. CDC Wren IV 94171-344
        4. SUN0104
        5. SUN0207
        6. SUN0327
        7. SUN0340
        8. SUN0424
        9. SUN0535
        10. SUN0669
        11. SUN1.0G
        12. SUN1.05
        13. SUN1.3G
        14. SUN2.1G
        15. SUN2.9G
        16. Zip 100
        17. Zip 250
        18. Peerless 10GB
        19. HITACHI-OPEN-V-SUN-7005
        20. SUN300G
        21. other
Specify disk type (enter its number)[19]: 0
c4t60060E80167D3C0000017D3C000010CAd0: configured with capacity of 35.99GB

selecting c4t60060E80167D3C0000017D3C000010CAd0
[disk formatted]
format> partition
PARTITION MENU:
        0      - change `0' partition
        1      - change `1' partition
        2      - change `2' partition
        3      - change `3' partition
        4      - change `4' partition
        5      - change `5' partition
        6      - change `6' partition
        7      - change `7' partition
        select - select a predefined table
        modify - modify a predefined partition table
        name   - name the current table
        print  - display the current table
        label  - write partition map and label to the disk
        quit
partition>
partition> print
Current partition table (unnamed):
Total disk cylinders available: 9828 + 2 (reserved cylinders)

Part      Tag    Flag     Cylinders        Size            Blocks
  0       root    wm       0 - 9827       35.99GB    (9828/0/0) 75479040
  1 unassigned    wu       0               0         (0/0/0)           0
  2     backup    wu       0 - 9827       35.99GB    (9828/0/0) 75479040
  3 unassigned    wu       0               0         (0/0/0)           0
  4 unassigned    wu       0               0         (0/0/0)           0
  5 unassigned    wu       0               0         (0/0/0)           0
  6 unassigned    wu       0               0         (0/0/0)           0
  7 unassigned    wu       0               0         (0/0/0)           0
partition> label
Ready to label disk, continue? yes
partition> q
format> q
# zpool online -e rpool /dev/dsk/c4t60060E80167D3C0000017D3C000010CAd0s0
# zpool list rpool
NAME    SIZE  ALLOC   FREE  CAP  HEALTH  ALTROOT
rpool  35.9G  23.6G  12.3G  65%  ONLINE  -
Good luck and safe expanding your pools.
In: SAN, Solaris, ZFS
Bryan Cantrill is back in BSDNow show
Another astonishing appearance of Bryan Cantrill in BSD Now episode
Highly recommended.
mysqldump causes error 2006
Hot on the heels of the recent mysqldump I’ve been running on MySQL 5.5 which ended with the following error:
Got error: 2006: MySQL server has gone away when selecting the database
Turned out that this error is quite common and there is a quick work around for that – increase max_allowed_packet. In my case going from 16M to 128M was enough.
P.S. There is a helpful thread at DBA Stackexchange which is worth reading too.
What unites DEFINER, “show table status” and ERROR 1143 (42000) in MySQL
For the very first time I had seen this error a couple of days ago:
mysql> show table status;
ERROR 1143 (42000): SELECT command denied to user ''@'some_host_name_here' for column 'sid' in table 'masking'
What the heck was that?!
Turned out that a colleague of mine was doing a cleanup in mysql.user table a day before and deleted a number of non-existent users. So what? Well, the database I was working with didn’t have only “plain” tables:
mysql> show full tables in database_name_here where table_type not like '%table%';
+-----------------+------------+
| Tables_in_infra | Table_type |
+-----------------+------------+
| v_pool          | VIEW       |
| v_pool_pivot    | VIEW       |
+-----------------+------------+
2 rows in set (0.00 sec)
Aha moment! So we had two views. Checked if there was a proper“DEFINER”:
mysql> select TABLE_NAME, DEFINER from information_schema.views;
+--------------+--------------------------------------------+
| TABLE_NAME   | DEFINER                                    |
+--------------+--------------------------------------------+
| v_pool       | some_user@some_host                        |
| v_pool_pivot | some_user@some_host                        |
+--------------+--------------------------------------------+
10 rows in set (0.00 sec)
Of course, that was exactly the user which was deleted and thankfully, that was very easy to fix.
Just had to run “show create view” query to figure out how the view was created in the first place:
mysql> show create view v_pool_pivot\G
*************************** 1. row ***************************
                View: v_pool_pivot
         Create View: CREATE ALGORITHM=UNDEFINED DEFINER=`some_user@some_host` SQL SECURITY DEFINER VIEW `v_pool_pivot` AS (select followed by several lines of spaghetti SQL)
character_set_client: utf8
collation_connection: utf8_general_ci
1 row in set, 1 warning (0.00 sec)
And after that just altered it:
mysql> alter DEFINER=CURRENT_USER view v_pool_pivot AS (select ...)
Puzzle solved.